How to Create a Hugo Blog Using GitHub
I am a professional developer, but I believe you do not need to be one to build a blog with some code. There are many tools out there that (usually with a fee) allow us to create websites without programming, and it is okay to use them.
However, if you, like me, just want a simple blog that you’d like to have control over, likes to code you can go with this approach.
Hugo is a static site generator (SSG) framework, which means it provides a structure, commands and tools to build websites just like this one.
Part 1: Git and Hugo
We are going to create two repositories. One of them is for development and other for deployment. Name them in a way you are not mixing them. For example:
/hugo-dev/my-blog
Then you clone your repository and inside of it follow the Hugo quick-start guide to install Hugo and create blog files.
The documentation also teaches you how to set up a custom theme, but for now I suggest picking the recommended one and later on switching.
Very important: after you are done trying the tools, make sure to go to your configuration file and properly add the GitHub URL. Your config file should look somewhat like this:
baseURL = "https://victor-schumann.github.io/my-blog/"
# title = "Victor Schumann"
author = "Victor Schumann"
This is (usually) https:// + your-github + .github.io/ + /production-repo-name
Part 2: Dev working, push to production
Good moment to commit changes, by the way.
In hugo, whenever we want to generate production files we use the hugo command. Before we do that, open a terminal inside your blog folder and clone your production repository as the “public” folder. To do this, use the command:
git submodule add -b main link-to-github/my-blog.git public
This tells git we want to add our production repositore with the name public. This is interesting because 1) we tell hugo to generate production files inside our repository, 2) we separate production and dev environments, which is a good practice. After that, run hugo in the root folder, and verify if the files correctly showed up in the /public folder.
Now, inside the submodule folder, git add ., git commit -m 'your message here', and git push to send your changes to the production repository.
Part 3: Publish on git
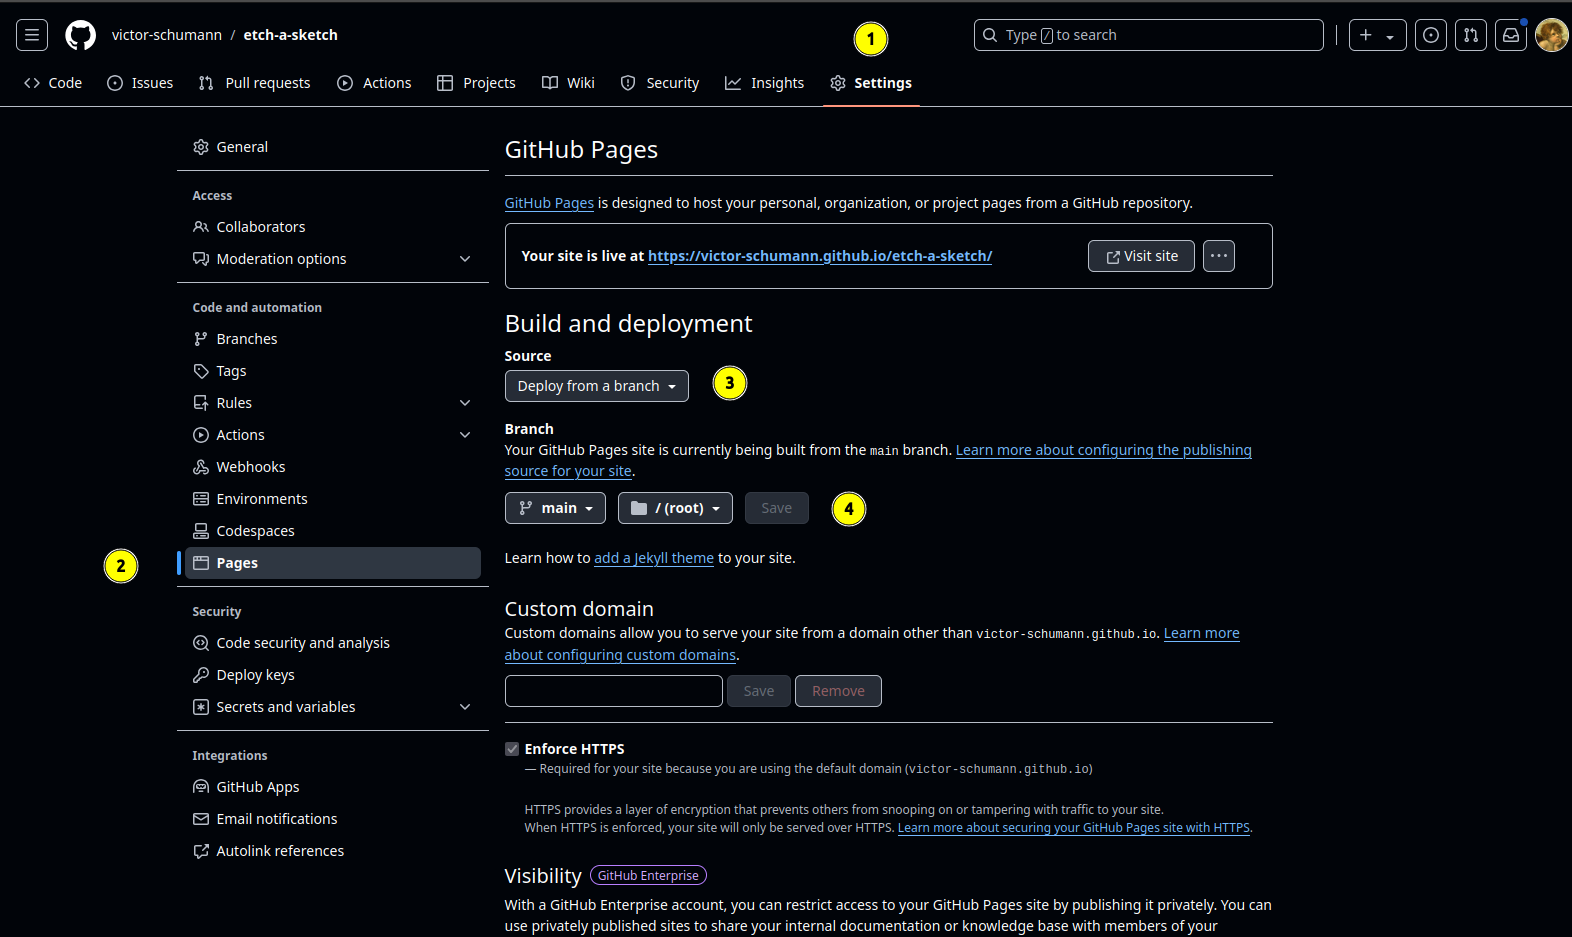
Go to your repository -> settings -> pages and make sure your main branch is selected, together with your root folder. You might have to wait some minutes, but there you have it.
If you followed this tutorial correctly, you should now have a working GitHub Hugo Blog. Just make sure the URL showing up at the GitHub pages is the same as the URL inside Hugo’s configuration file.
If you got lost, you can check this video which depicts the above process.
Notes and reminders
- When you clone all of this in a new env, you will need to
git submodule update --init --recursive - To build, use
hugo serverandhugocommands.